Using an Amazon Dash Button with Any.Do
«Preface by Inbar»
Every now and then, when I’m sitting on the toilet, I realize that I’m using the last roll of toilet paper and I should replenish the stock in the bathroom cabinet drawer next to me. But 90% of those times I forget it 20 seconds later. I wanted to find a solution that would enable me to add it to my To-Do list - I’m using Any.Do - so I don’t forget.
I remembered that a while back, Amazon had released the Amazon Dash Button (which has, since then, been replaced by the Virtual Dash Button) and I also remembered that it was rather quickly hacked to do other things. And so I decided that I would hack an Amazon Dash Button to add “Replenish toilet paper” to my To-Do list.
The problems I faced:
- The hacks I remembered were either performed on an earlier version of the button, or involved a teardown and hacking the chip itself.
- Any.Do doesn’t have a public API, so even if I got over the first problem, I’d still be stuck.
The solution I chose:
Find a way to make use of Alexa, which has Any.Do integration.
“How,” you ask?
By telling Alexa to “add Replenish toilet paper to my to-do list,” of course. How else?
«/Preface by Inbar»
Version 1: Use a mini-router as an access-point
We wanted to use as many off-the-shelf parts, and to make this as little sophisticated as possible. One of the principles that we like to follow is to try to only add one degree of difficulty at a time. It’s particularly important when you’re doing something for the first time. If the objective is to learn something new, and time is not of the essence, then there’s no reason to rush and try to take three steps at a time.
Internet
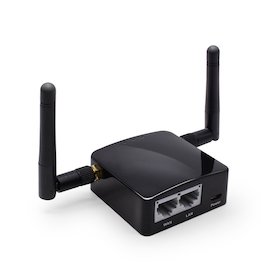
Our usual meeting place is a nice coffee place in Tel-Aviv, so an Internet connection was not a problem. However, we needed a WiFi network that we can own and play with its configuration, so just using Arcaffe’s Internet connection wasn’t going to work. So what do we do? Enter GL-iNet GL-AR300M - a tiny, portable router with WiFi, Ethernet and pre-installed open-wrt.

We used the GL-AR300M as a router: The WAN came from Arcaffe’s WiFi network, and our set-up and experiments were all performed on the NAT-ted LAN over the GL-AR300M’s WiFi (Yes, it can do both at the same time!) That way we had a local, fully controlled WiFi that also has Internet connection.
Working platform
We chose the RaspberryPi as our working platform early on, because of the simplicity of using it with an external speaker in order to give voice commands to Alexa. You can read more about such a setup here. It is also a full-fledged linux server, and it’s very easy to play around with things.
Connecting the Amazon Dash Button
Setting up the Amazon Dash Button (ADB from now on) involves connecting it to a wireless network, and then assigning it a product. We will only take the first step, and stop right after it. You can read more on this here.
Once your ADB is connected to the Internet, it’s time to see what happens when you press the button.
pi@raspberrypi:~ $ sudo tcpdump -i wlan0 -w dash.pcap
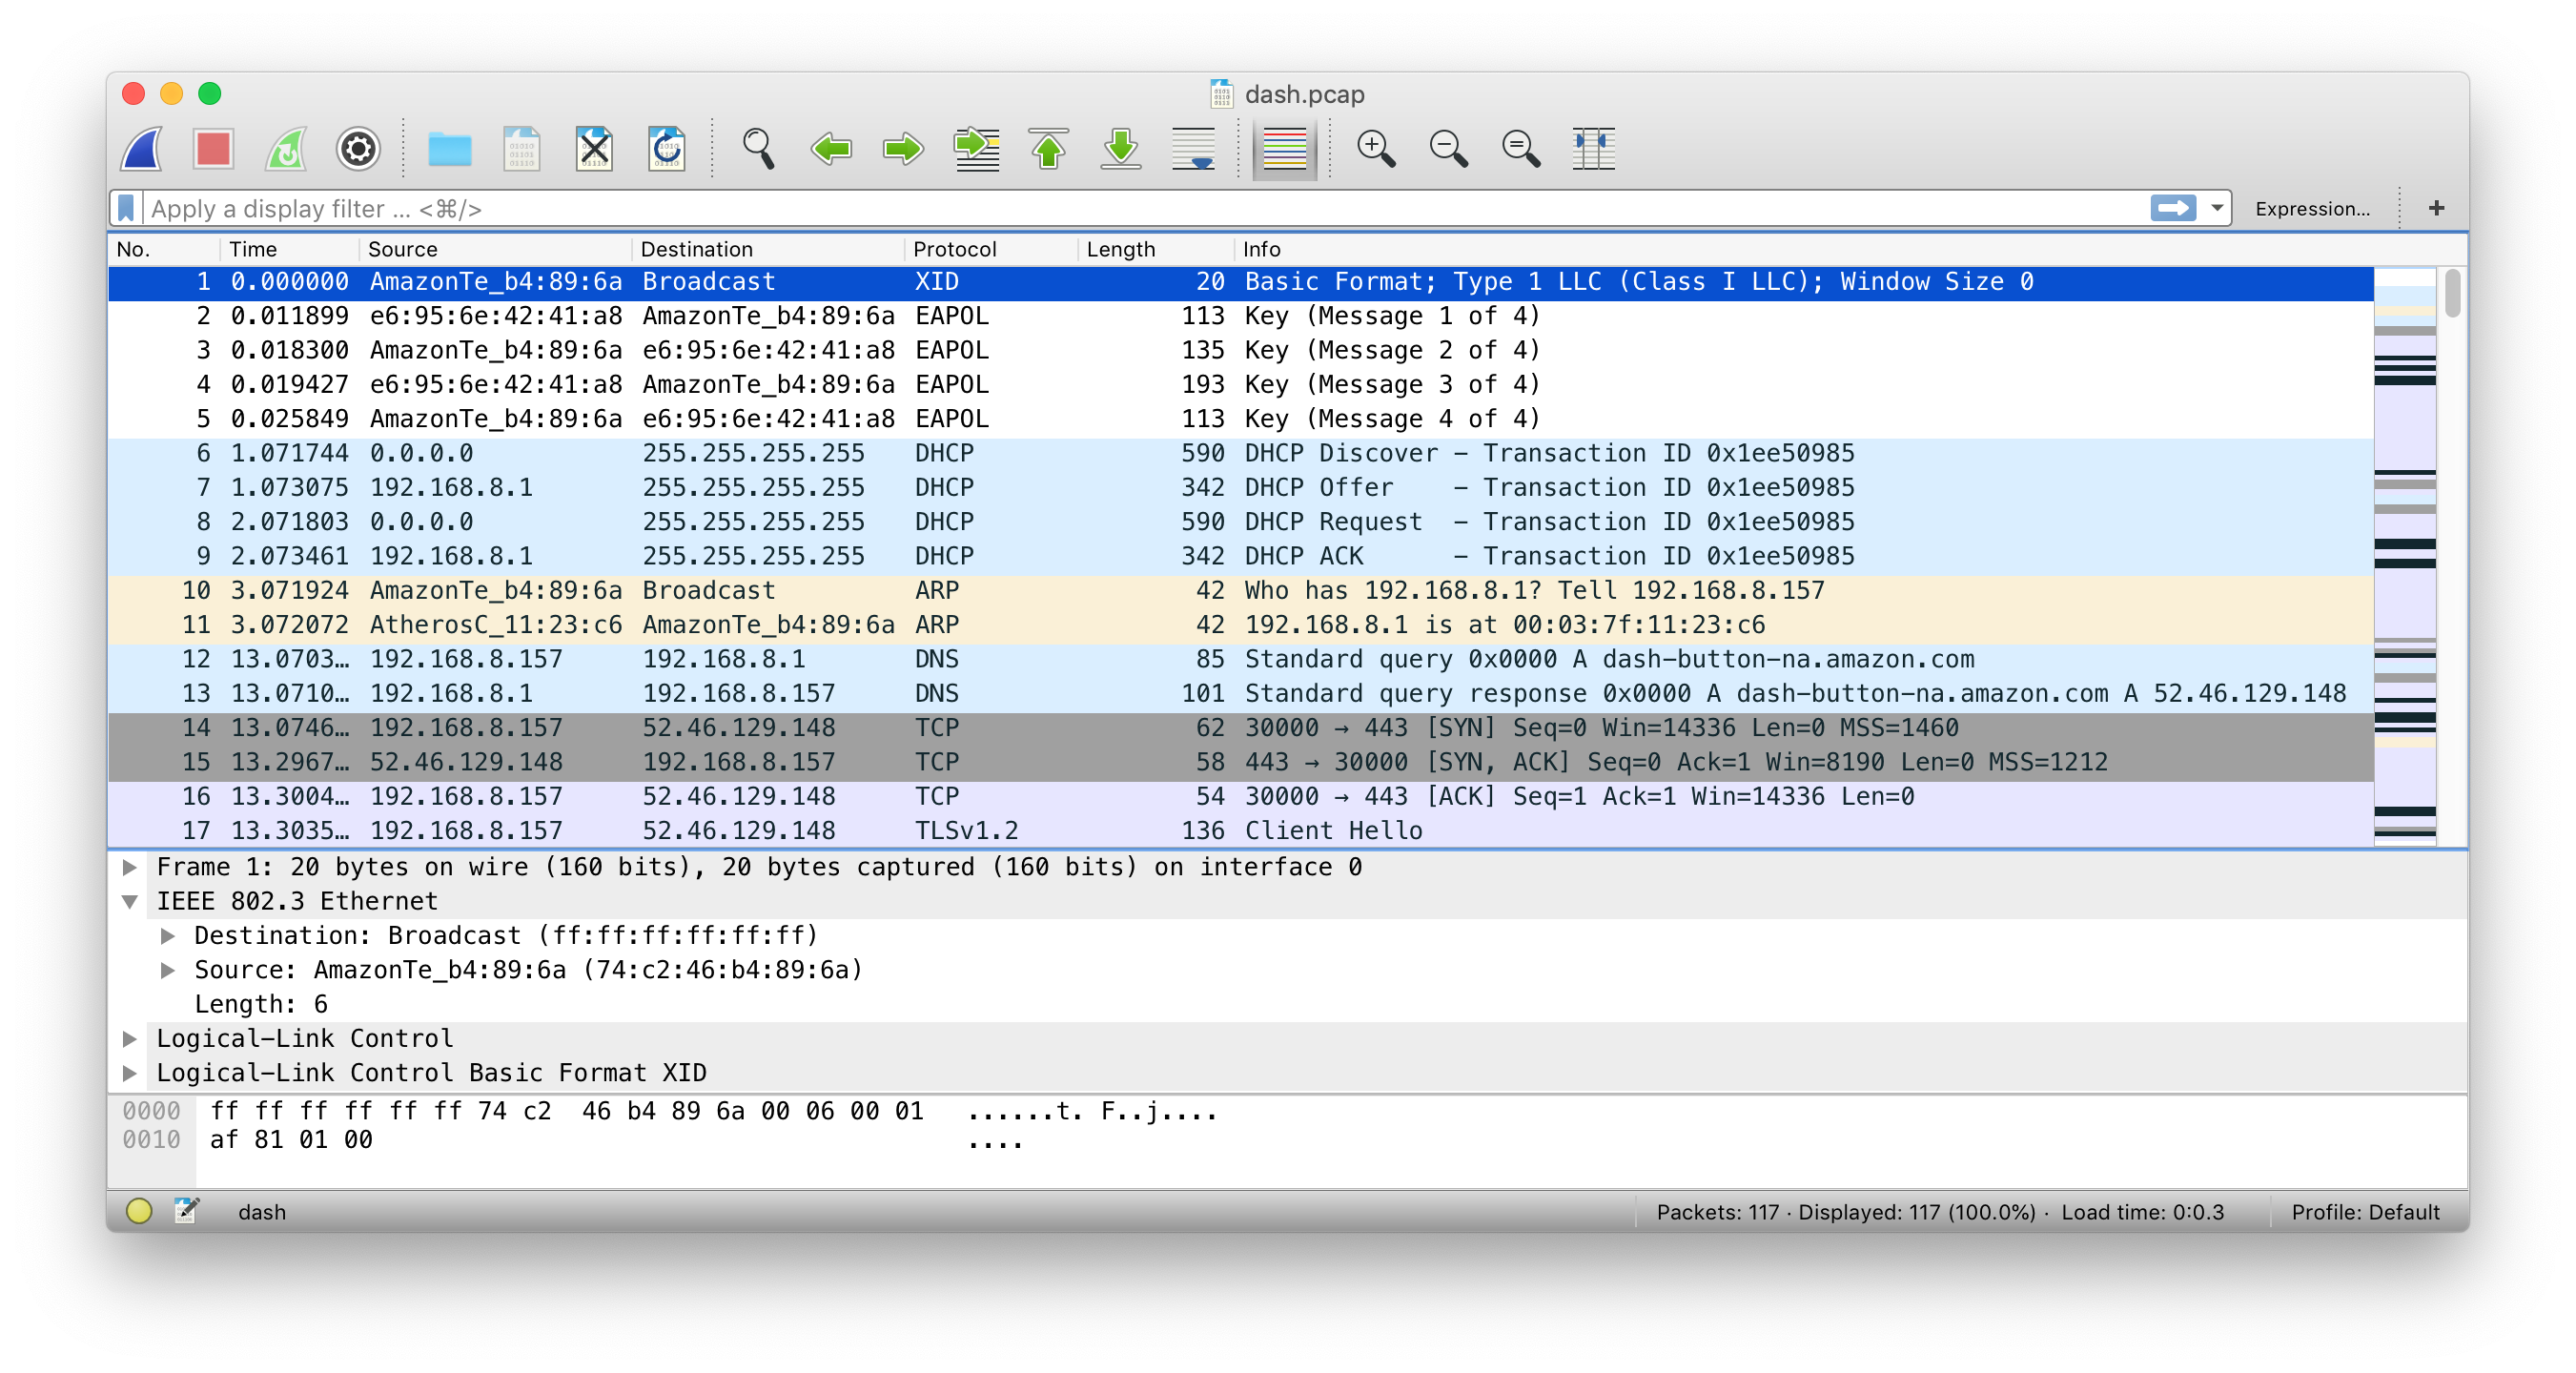
Load the pcap file into Wireshark to view:

Here’s what’s going on:
- ADB hops on the Wifi network [pkt 1-5]
- ADB requests an IP address using DHCP [pkt 6-9]
- ADB looks for the gateway and DNS [pkt 10-11]
- ADB asks for the address for dash-button-na.amazon.com [pkt 12-13]
- ADB starts a TLS session with dash-button-na.amazon.com [pkt 14-17]
Looking at the capture file, you can see the following interesting pieces of information:
- Pkt 1: The MAC address for the Amazon Dash Button is 74:c2:46:b4:89:6a
- Pkt 12: The ADB is trying to access an Amazon server at dash-button-na.amazon.com
As a rudimentary proof of concept, we port-forwarded all UDP port 67 requests on the GL-AR300M (the DHCP requests) to our RaspberryPi at UDP port 9000, and wrote a very simple Python server, listening on port 9000. Once an incoming connection was detected, it meant the ADB was hopping on the network and asking for an IP address. The script then used espeak to give Alexa the voice command:
import socket
import subprocess

UDP_IP = "0.0.0.0"
UDP_PORT = 9000

sock = socket.socket(socket.AF_INET, # Internet
                     socket.SOCK_DGRAM) # UDP
sock.bind((UDP_IP, UDP_PORT))

counter = 0

while True:
    data, addr = sock.recvfrom(1024) # buffer size is 1024 bytes
    if counter == 2:
        print "received message:", data
        cmd = "espeak -s 135 -v en-us \"Alexa. . . . Add replenish toilet paper to my to do list.\""
        ps = subprocess.Popen(cmd, shell=True, stdout=subprocess.PIPE,stderr=subprocess.STDOUT)
        output = ps.communicate()[0]
        print output
        counter = 0
    else:
        print "Else"
        counter = counter + 1
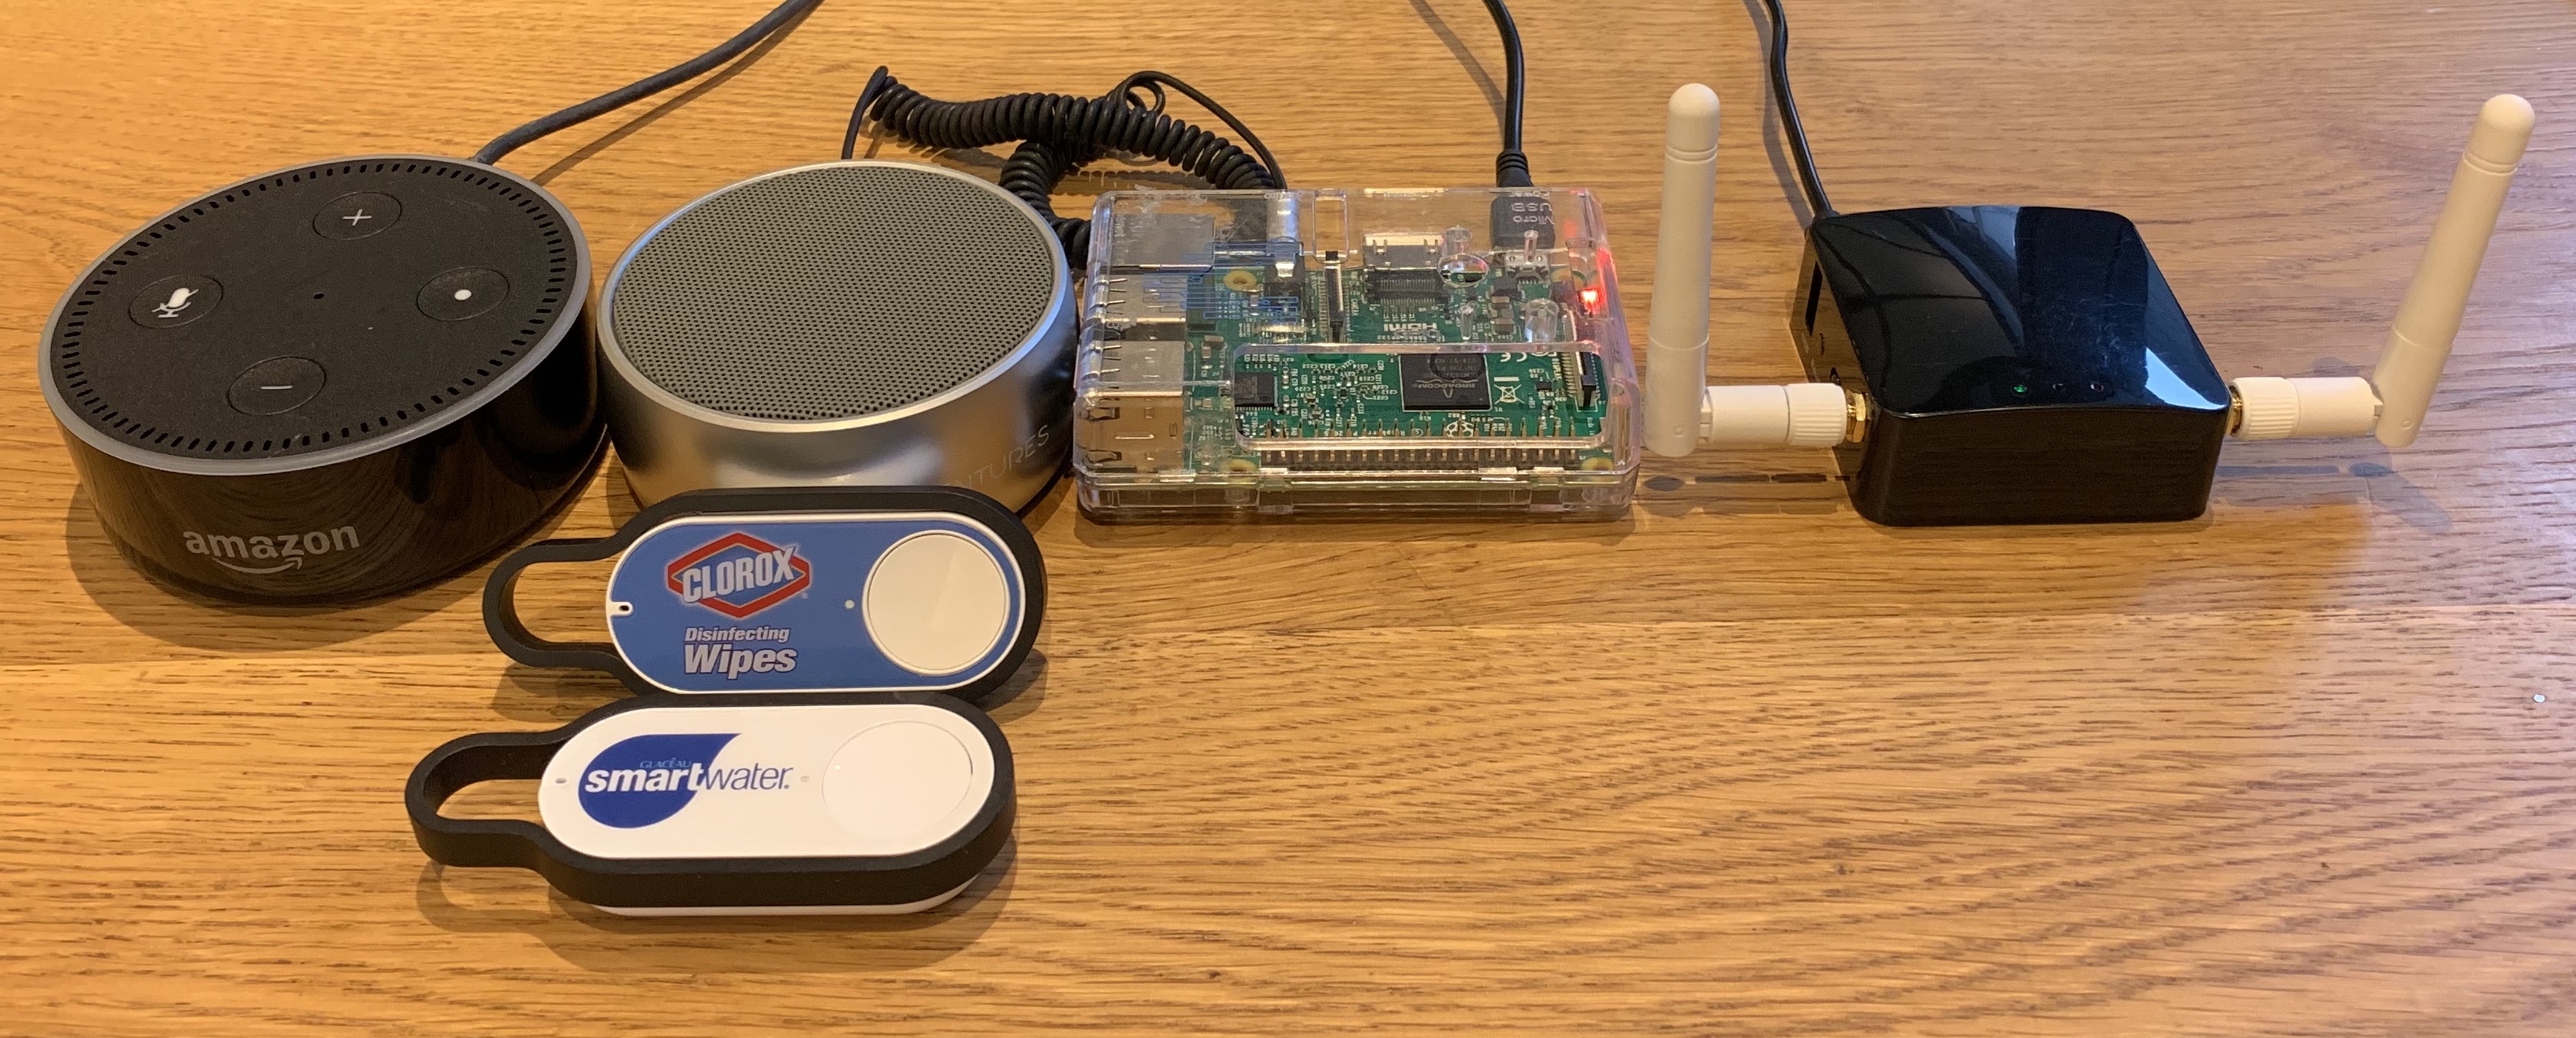
And the resulting setup looks like this:

That was some very ugly work there, we’re the first to admit, but it worked. Still, we felt like we needed to shower after this…
Ugly is nice for PoC but not something you’ll want to show off in a blog post or, if you’re lucky, get featured on Hackaday. It was time to start making things look more decent (and dear Lord, avoid shell commands…)
Version 2: Drop the mini-router, do it all off the RasPi
It was nice to prototype and get it running over the GL-AR300M, but once the setup was up and running (and the achievement was unlocked), we started thinking about optimizing. Since the RaspberryPi 3 model B has its own built-in WiFi adapter, why not just use it as both the access point and router?
We followed this guide to set up the RaspberryPi as a Wireless Access Point, and got rid of the GL-AR300M. Once again we redirected dash-button-na.amazon.com to ourselves.
Now, however, there was no need to use port-forwarding, and we could try to catch the ADB trying to call home - that would allow us to co-exist on the same network with other devices. We upgraded the script to listen on port 443 (The SSL port) and catch the connection:
import socket
import subprocess

TCP_IP = "0.0.0.0"
TCP_PORT = 443

sock = socket.socket(socket.AF_INET, # Internet
                     socket.SOCK_STREAM) # TCP
sock.bind((TCP_IP, TCP_PORT))
sock.listen(5)
counter = 0
client_socket, address = sock.accept()
while True:
    data, addr = client_socket.recvfrom(1024) # buffer size is 1024 bytes
    if counter == 2:
        print "received message:", data
        cmd = "espeak -s 135 -v en-us \"Alexa. . . . Add replenish toilet paper to my to do list.\""
        ps = subprocess.Popen(cmd, shell=True, stdout=subprocess.PIPE,stderr=subprocess.STDOUT)
        output = ps.communicate()[0]
        print output
        counter = 0
    else:
        print "Else"
        counter = counter + 1
You’ll notice a counter there. This is because the ADB doesn’t give up easily and will try calling home three times before giving up. We only wanted to react once, so we were waiting for the third and last attempt.
The setup was getting thinner:

This was better, no doubt, but the main problem was that this setup could not tell who was trying to access Amazon. If we wanted to use more than one ADB in our setup, we wouldn’t be able to tell them apart using this script.
It was time to get surgical.
Version 3: Recorded voice and DNSMASQ scripts
Using espeak was nice but the quality of the speech left much to be desired. We needed a clear pronunciation that Alexa would understand every time. Since both of us are using MacBooks, we decided to use Apple’s much better version of text-to-speech. The only remaining question was which voice to use.
Here are all the English voices that OSX’s say supports:
localhost:~ inbar$ say -v ? | grep "en_"
Alex        en_US    # Most people recognize me by my voice.
Daniel      en_GB    # Hello, my name is Daniel. I am a British-English voice.
Fred        en_US    # I sure like being inside this fancy computer
Karen       en_AU    # Hello, my name is Karen. I am an Australian-English voice.
Moira       en_IE    # Hello, my name is Moira. I am an Irish-English voice.
Samantha    en_US    # Hello, my name is Samantha. I am an American-English voice.
Tessa       en_ZA    # Hello, my name is Tessa. I am a South African-English voice.
Veena       en_IN    # Hello, my name is Veena. I am an Indian-English voice.
Victoria    en_US    # Isn't it nice to have a computer that will talk to you?
Some trial and error determined that Samantha had the clearest pronunciation of the voice command, but ironically she was mispronouncing the name Alexa, which would have been pointless. A small phonetic workaround was used, and now we needed to dump the output to an AIFF file. We used a slightly-slower-than-default word rate, in order to make everything nice and clear:
localhost:~ inbar$ say -v Samantha -r 135 -o "replenishtoiletpaper.aiff" "Ah-lexa. . . . Add replenish toilet paper to my to do list."
That took care of the voice command. Now it was time for multi-device support.
After some Googling, we found a blog post by Jan-Piet Mens, titled “Tracking DHCP leases (dnsmasq)” - turns out that dnsmasq will allow you to execute an external script whenever a DHCP event occurs. That was great - we would be able to look at the MAC address, know which ADB is calling us (in case there was more than one) and react accordingly.
#!/bin/sh

# Credit: Script based on Jan-Piet Mens' blog post:
# https://jpmens.net/2013/10/21/tracking-dhcp-leases-with-dnsmasq/

# Log file location (for debugging or tracking)
LOGFILE=/home/pi/AmazonDash/dns_events.log

# Define MAC addresses for participating devices
dash_ToiletPaper="74:c2:46:b4:89:6a"
dash_TellEzraHi="74:c2:46:4c:29:07"

# Extract arguments
op="${1:-op}"
mac="${2:-mac}"
ip="${3:-ip}"
hostname="${4}"

# Logging - Good for debugging and determining MAC addresses of new devices
command="Op: ${op}, MAC: ${mac}, IP: ${ip}, hostname: (${hostname})"
echo -n `date` ${command} "- " >> ${LOGFILE}

# Do not respond to DHCP Release events (op = "del")
if [ "${op}" = "del" ]; then
  echo "del operation ignored" >> ${LOGFILE}
  exit
fi

# Look for known devices and act accordingly
if [ "${mac}" = "${dash_ToiletPaper}" ]; then
  omxplayer -o local /home/pi/AmazonDash/replenishtoiletpaper.aiff
  info="Toilet Paper"
elif [ "${mac}" = "${dash_TellEzraHi}" ]; then
  espeak -s 135 -v en-us "Hi Ezra. . . . This is working great!"
  info="Ezra"
else
  info="Unknown device"
fi

echo ${info} >> ${LOGFILE}
As you can see, this is the first version where Inbar used espeak to show Ezra that the feature works. Naturally, there would be another AIFF file there ;-)
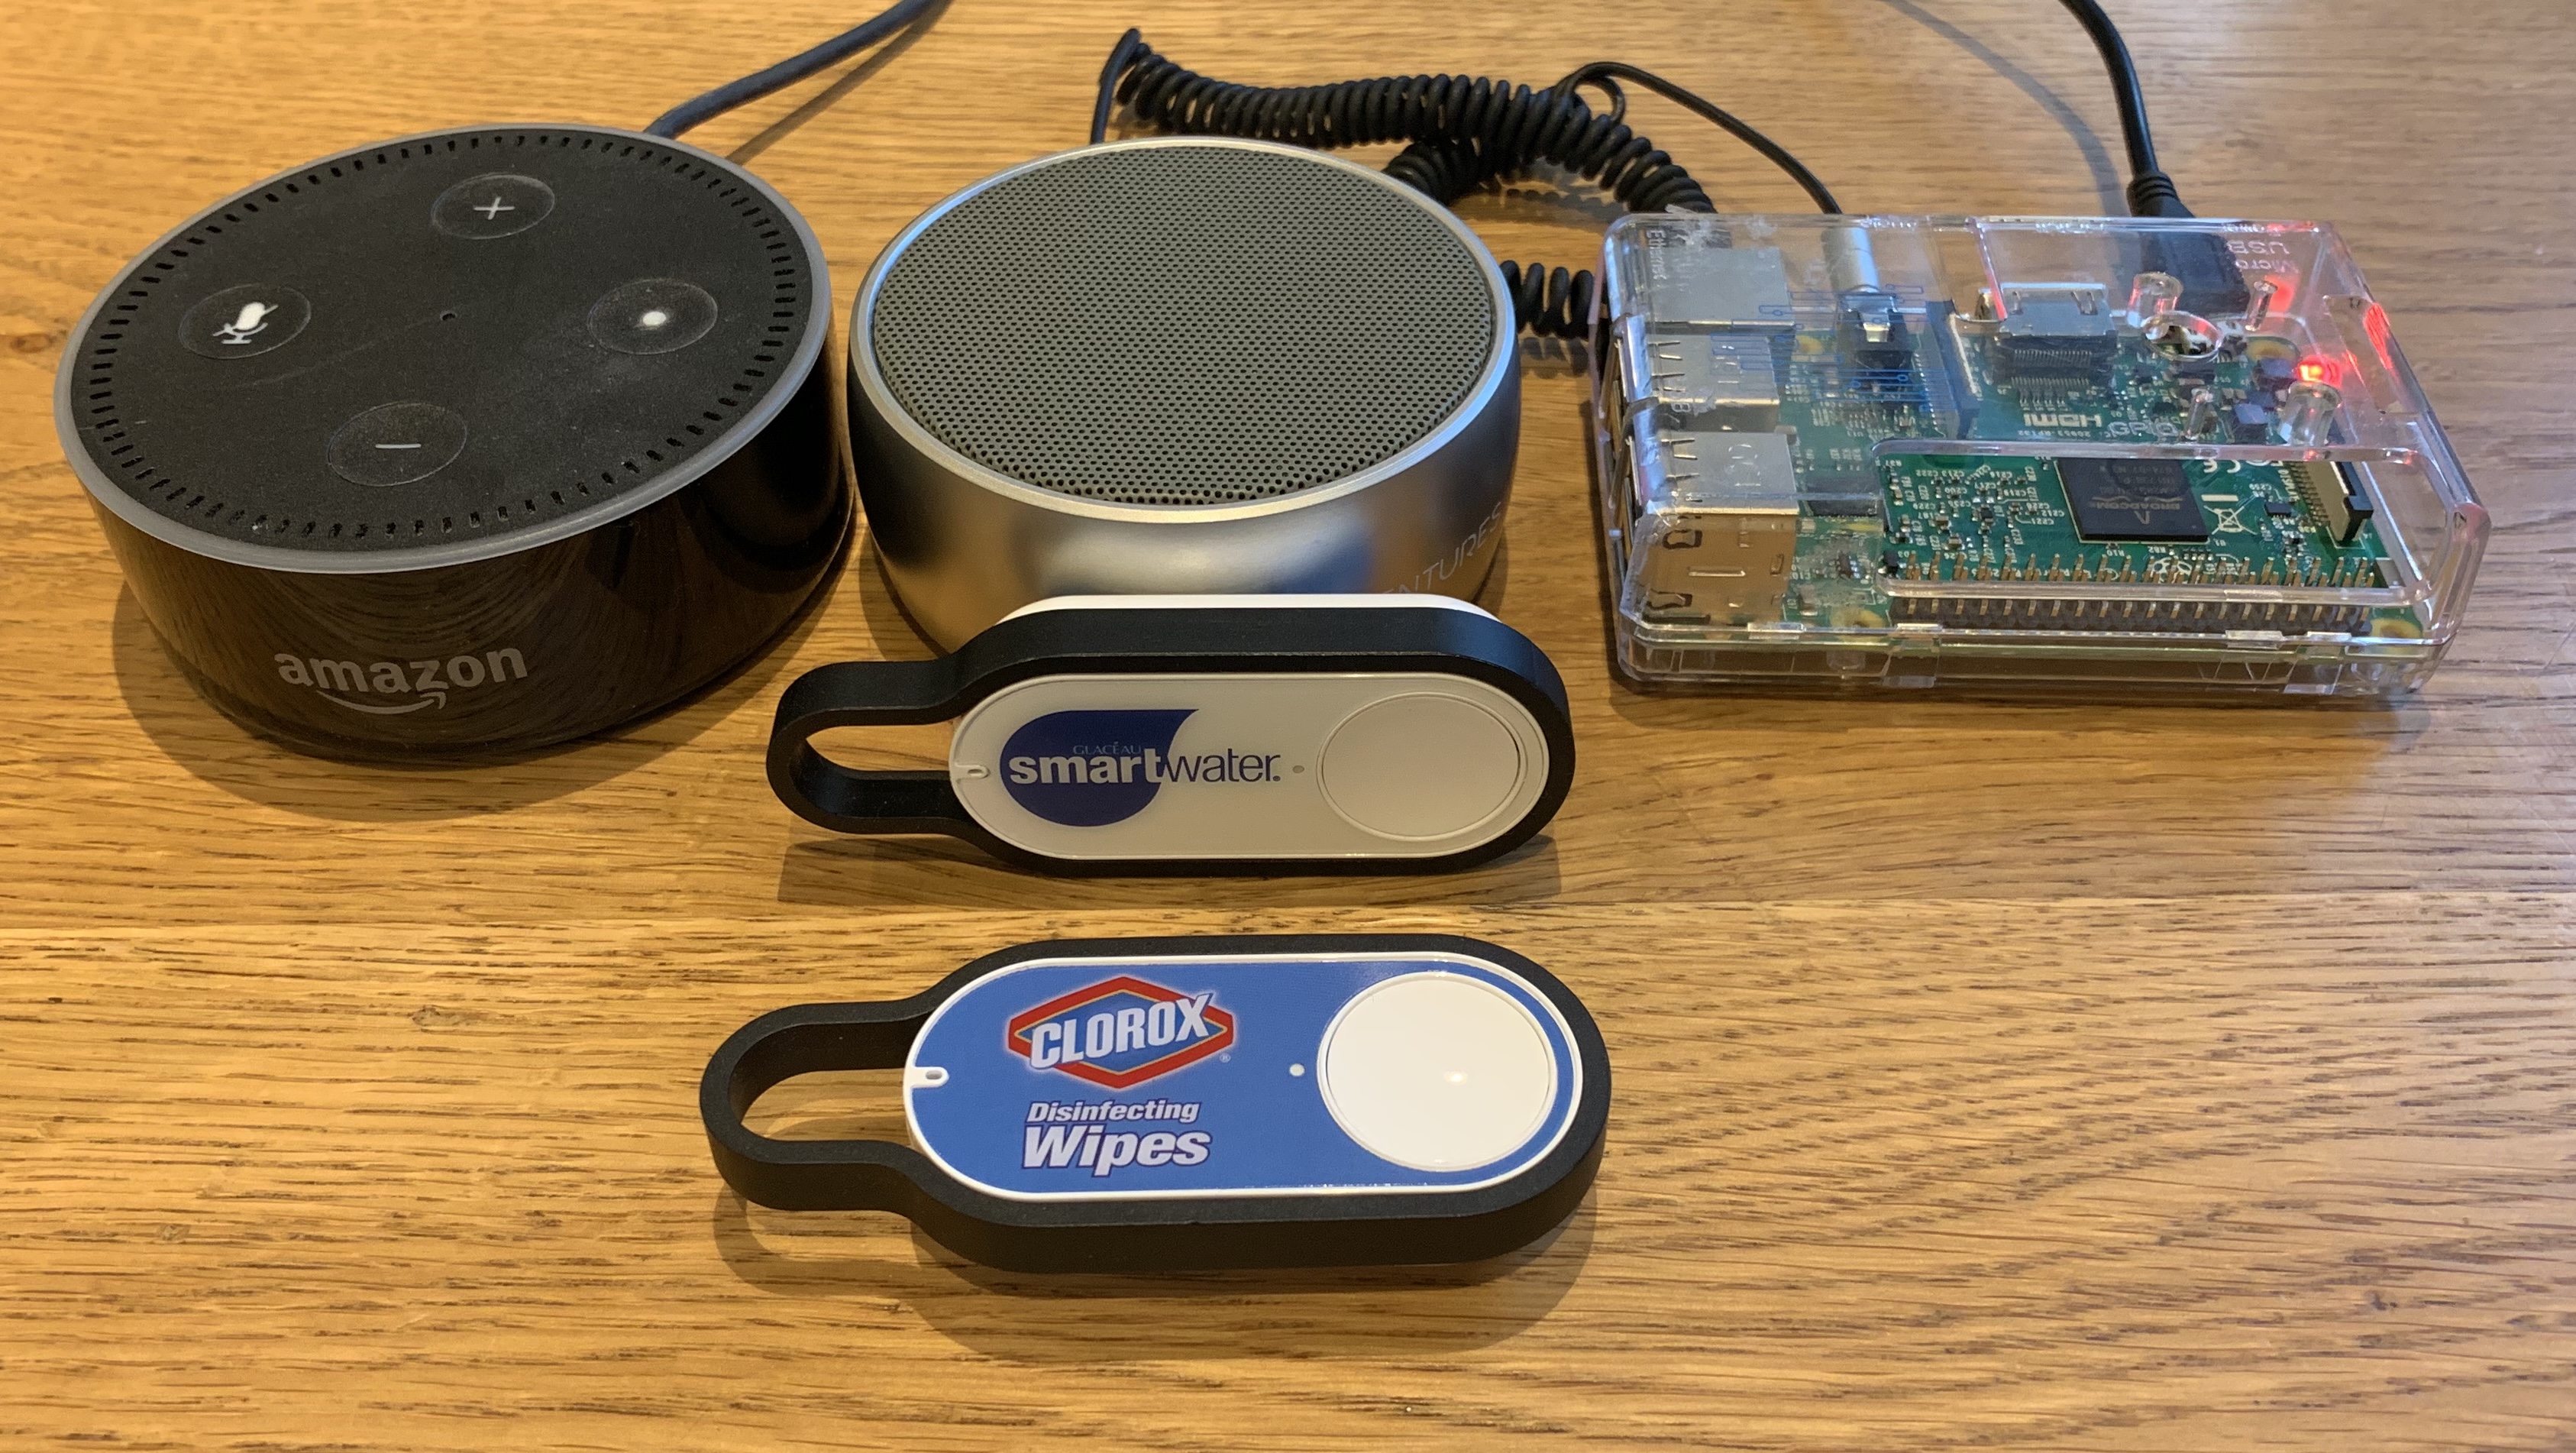
And so the final setup was now working, and this is what it looked like:
And here’s us, working on the project:

Epilogue / Next steps
The funniest thing about this all, was Ezra’s wife’s reaction when we demonstrated this marvelous feat:
“Seriously? You are using three different devices to remind you that?!?”
Luckily for Ezra, he’s already married so she can’t leave him for this.
This was a great setup and way past the MVP stage, and we decided to publish it. But there are more things that we could do. At the top of our list is switching to using Bluetooth in order to wirelessly connect to the external speaker. But we’ll see.
Similar projects and references
Obviously, we weren’t the first to think about this idea. Other have tried it before us. But we did this, like almost everything else you’ll read about in this blog, in order to learn a new skill to just have some good old fun.
Here are some similar projects and sources of information we used during the research: